To remove a semi truck brake drum, start by removing the wheel and tires, then the dust cap and cotter pin. After that, remove the spindle nut and bearing, before finally removing the brake drum from the axle.
When it comes to maintaining and repairing a semi truck’s braking system, removing and replacing the brake drum is a crucial task. Adequate knowledge and proper tools are essential for a smooth and efficient removal process. Whether it’s for routine maintenance or addressing a specific issue, knowing how to remove a semi truck brake drum is an important skill for any truck owner or mechanic.
In this guide, we’ll outline the step-by-step process for removing a semi truck brake drum, providing you with the knowledge and confidence needed to tackle this task effectively.

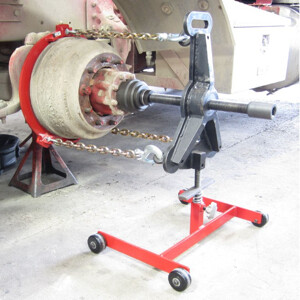
Credit: www.brakemate.com
Navigate As You Want:
Preparation
Removing a semi truck brake drum requires careful preparation. Follow these steps to safely remove the brake drum and ensure optimal performance.
Gather The Necessary Tools
To safely remove a semi truck brake drum, it’s important to gather the necessary tools. You will need a proper set of heavy-duty wrenches, such as a socket wrench and a breaker bar, to loosen the lug nuts. Additionally, have a rubber mallet on hand to tap the drum off its housing. It’s essential to ensure safety during the process. Start by donning a pair of heavy-duty gloves to protect your hands. Remember to use safety glasses or goggles to safeguard your eyes from any debris or particle that may fly off during the removal. Practicing these safety measures will ensure a smooth and secure brake drum removal process.
Step-by-step Guide
To remove a semi truck brake drum, follow these steps:
- Loosen the lug nuts using a wrench
- Next, remove the wheel carefully
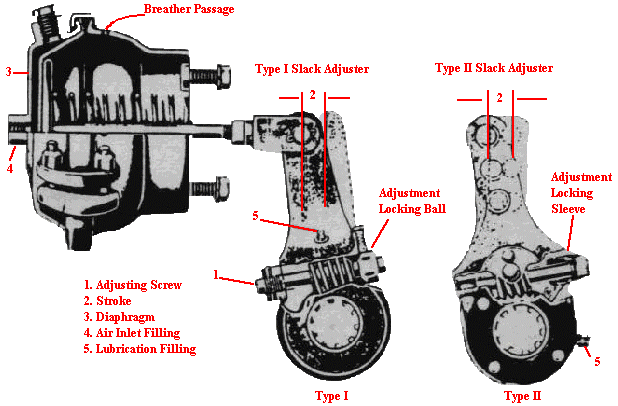
- Release the brake pressure from the brake chamber
- Now, remove the retaining clips securing the brake drum
- Slide off the brake drum from the wheel hub
Inspection And Cleaning
Inspect brake components: Begin by checking the brake drum, brake shoes, and other components for any signs of wear, damage, or excessive rust. Look for any cracks or deformities in the brake drum and ensure that the brake shoes are in good condition.
Clean the brake drum: Use a suitable brake cleaning solution and a wire brush to thoroughly clean the inside of the brake drum. Remove any dirt, debris, or rust buildup to ensure smooth and efficient braking performance.

Credit: www.kienedieseltools.com
Replacement And Reassembly
Replacing and reassembling the brake drum on a semi truck is a crucial maintenance task. To install a new brake drum, start by securely attaching retaining clips. Make sure they are properly aligned and tightly fastened to prevent any issues with the brake system. Once the clips are in place, carefully reassemble the brake system, ensuring that all components are correctly aligned and connected. Take care to follow the manufacturer’s specifications and guidelines throughout the process to ensure optimal performance and safety. Regular inspection and maintenance of the brake system, including replacing worn or damaged parts, should be done to prevent any potential accidents or malfunctions on the road. Keep in mind that a well-maintained brake system is essential for safe and efficient operation of a semi truck.
Testing And Final Steps
Testing and Final StepsIn order to ensure a successful brake drum removal, it is vital to test the brake system before proceeding further. First, carefully inspect the brake components such as the pads, calipers, and rotors for any signs of wear or damage. Make sure to replace any worn-out parts to ensure optimal braking performance.
Next, you need to install the wheel back onto the axle hub. Align the holes on the wheel with the corresponding studs on the axle and push it in place. Once aligned, tighten the lug nuts securely using an appropriate wrench or a socket.
Finally, before taking the vehicle for a test-drive, it is essential to check for proper brake function. Pump the brakes a few times to build up pressure and make sure they are responding correctly. You should feel a firm pedal, and the vehicle should come to a smooth and controlled stop when braking. If any issues are detected, address them immediately before driving.

Credit: m.youtube.com
Frequently Asked Questions For How To Remove Semi Truck Brake Drum
How Do You Remove A Semi-truck Brake Drum?
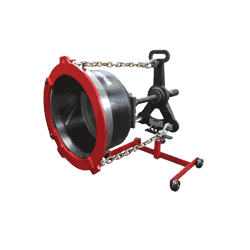
Removing a semi-truck brake drum involves loosening the lug nuts, removing the wheel, and disconnecting the brake drum from the wheel hub. Use a brake drum removal tool to pull the drum away from the hub. It is important to follow proper safety procedures and consult the vehicle’s service manual for detailed instructions.
What Tools Are Needed To Remove A Semi-truck Brake Drum?
To remove a semi-truck brake drum, you will need a lug wrench or impact wrench to loosen the lug nuts, a jack and jack stands to lift and secure the vehicle, a brake drum removal tool to pull the drum away from the wheel hub, and a torque wrench to properly tighten the lug nuts when reinstalling the brake drum.
Can I Remove A Semi-truck Brake Drum Without Professional Help?
Yes, you can remove a semi-truck brake drum without professional help if you have the necessary tools and follow proper procedures. However, it is important to have a good understanding of the process and to exercise caution to ensure your safety and the proper functioning of the braking system.
If you are unsure or uncomfortable with the task, it is recommended to seek professional assistance.
Conclusion
Removing a semi-truck brake drum requires proper technique and tools to ensure safety and efficiency. By following the step-by-step instructions in this blog post, you can easily replace your old brake drum with a new one. Remember to always prioritize safety and use caution when working with heavy machinery.
With the right knowledge and care, you can maintain your semi-truck brakes and keep your vehicle running smoothly for years to come.


